Pages

Thursday, November 11, 2010

Easy Caramel Corn


Print

With Fall, comes tailgating and football parties.  And with tailgating and football parties, comes food (more importantly, snacks).  That's where this recipe comes in!  This is probably the easiest recipe out there for homemade caramel corn (at least from what I've found) and don't let the ease of the recipe fool you: it's just as tasty!


I've been making this caramel corn for years now and it's always been a hit whether I've brought it to work parties, holiday gatherings, giving away as gifts or just making it here at home for something to munch on.  It's also very versatile and can be combined with other goodies such as pecans, candy corn, peanuts, etc. 


Easy Caramel Corn

Ingredients
3 bags Unbuttered Popcorn, popped
1 cup Unsalted Butter
2 cups Brown Sugar, packed
1/2 cup Light Corn Syrup
1/2 Tsp. Baking Soda

Directions
Empty the popcorn into a brown paper bag, being careful to not let the unpopped kernels get in.

In a small saucepan, combine the butter, brown sugar and corn syrup over med-high heat.  Bring to a boil and cook for 5 minutes, stirring constantly.  Remove from the heat and stir in the baking soda.

Pour the caramel over the popcorn in the bag; close the bag and shake well.  Microwave on high for 2 minutes.  Remove and shake well or mix with a wooden spoon so that all of the popcorn is coated in caramel.  Spread over wax paper and let cool. 

**Be careful as it will be very hot coming out of the microwave**


Yield: 14-16 Servings
Source: From Grand Temptations
Continue reading...

Wednesday, November 10, 2010

Cheddar & Jalapeno Popovers


Print

For some reason people always ask about ideas to make alongside a big pot of soup and with all of the soups and stews I've made recently (and with more to come), I've found that the best sides include a nice, green salad and bread of some sort.  Determining what type of salad and/or bread to make to accompany your soup will depend a lot on the ingredients and flavors your soup will have.  Playing up the flavors of your salad and the texture of the bread can really help to complement the soup itself.

To give you an idea, the Squash Bisque I made recently was paired with a salad of romaine, sliced pears, Gorgonzola cheese, dried cranberries, candied pecans and a cider vinaigrette.  Alongside it, was a fresh loaf of French bread, perfect for dipping!  In this case, you could easily add some grilled chicken to the salad to boost up your protein, but I found the soup hearty enough that it wasn't necessary.  This combination provided the perfect Autumn meal while utilizing fresh, in-season ingredients and still rather figure-friendly.

If it's a nice hearty Chili, for instance, I usually opt for a simple green salad with a few fresh veggies and a nice vinaigrette.  To have a little fun and play up the spicy flavors of the chili, I might make a salad utilizing fresh tomatoes, red onion and a cilantro lime vinaigrette (a little Mexican cheese would be great on top as well).  For bread pairings, you can never go wrong with a good old-fashion Southern cornbread!  Mexican cornbread is great as well as is this recipe for Cheddar & Jalapeno Muffins!

I actually made these recently to go alongside a large pot of Chili and it was a nice contrast to the normal cornbread we usually have.  Personally, I thought they could've used a tad more salt than what the recipe called for and next time, I'll definitely add more jalapeno.  But all in all, I really liked them...the only trouble we really ran into was getting them out of the cupcake liners!  I thought I had bought decent liners; they were made by Wilton after all, but to our surprise they stuck terribly to the popovers, making it rather difficult to peel away.  So, unfortunately, remnants of the popovers went to waste but we still managed to work with the best part: the middle!  I guess lesson learned...don't buy Wilton cupcake liners again!


Cheddar & Jalapeno Muffins

Ingredients
3 Eggs
1 1/4 cups Milk
1 1/4 Flour
1/2 Tsp. Salt
3 Tbsp. Unsalted Butter, melted
2 Jalapenos, minced
3/4 cup Cheddar Cheese, shredded

Directions
Preheat the oven to 400 degrees.  Line a muffin tin with cupcake/muffin liners.

In a large bowl, beat the eggs until foamy.  Gradually add in the milk, beating at low speed.  Add in the flour and salt; beat until smooth.  Mix in the butter.

Fill each cup half-full with the batter.  Sprinkle evenly with the cheese and jalapenos and top with more batter, filling the cups up. 

Bake for 45-50 minutes or until brown.  Let cool for 1 minute and serve warm.

Note: The ingredient list above reflects the changes I would make to the recipe, including adding more salt and jalapenos.  The original recipe calls for 1/4 Tsp. of salt and does not include jalapenos.


Yield: 8 Muffins
Source: Adapted from Grand Temptations
Continue reading...

Monday, November 1, 2010

Chorizo, Potato & Mushroom Tacos


Print

I don't think I need to explain my obsession love for Mexican food.  It's pretty cut and dry and something that will probably always be an obsession love of mine.  Next to cheeseburgers and ice cream, it's at the top of my list of favorites!  I mean, usually when we go out for dinner, it's what is on my mind to get (we usually have to choose between Mexican and sushi).  And it doesn't stop there...I love making Mexican-inspired meals at home!

I came across this recipe on Pink Parsley not all that long ago and marked it as one to try.  Each week that I sat down to do my meal planning, this recipe seemed to pop up, but for one reason or another I'd brush it off and tell myself I'd make it another time.  Well ladies and gentlemen, that time has finally come.  And let me be the first to admit what a HUGE mistake it was to put off for so long!  This was, seriously, one of the easiest and tastiest meals I have thrown together in a long time.  I'd have to say it's climbed right up there as one of my top meals (probably right alongside the Creamy Shrimp & Grits)!

The spiciness of the chorizo with the crispy, soft potatoes and sauteed mushrooms make for an explosion of textures and flavors in your mouth.  We served them on real corn tortillas (the best) with a little cilantro, sour cream and salsa verde.  Paired alongside some Spanish Rice and Mexican Fried Corn, this recipe is surely going to find it's way in our regular meal rotation!  Please do me a favor and don't deprive yourself as long as I did from inhaling tasting these!


Chorizo, Potato & Mushroom Tacos

Ingredients
2 Tbsp. Olive Oil
1 Lg. Potato, cubed
1 - 15 oz. pkg. Chorizo, casings removed
1/2 Med. Onion, diced
6 oz. Button Mushrooms, chopped roughly
Salt to taste
Pepper to taste
1/2 cup Cilantro, chopped
Corn Tortillas, warmed
Sour Cream (optional)
Salsa Verde (optional)

Directions
In a large pan, heat olive oil over med-high heat.  Add in the potatoes and cook, stirring frequently, until crisp on the outside (about 7-8 minutes).  Transfer to another dish and set aside.

In the same pan, begin crumbling the chorizo over med-high heat.  Cook, stirring often to break up any large pieces, until heated through (about 5 minutes).  If needed, carefully drain the grease from the pan. 

Add in the onions and mushrooms to the chorizo; cook, stirring occasionally, until tender (about 3 minutes). 

Add in the potatoes to the chorizo mixture and season with salt and pepper to taste.  Cook until the potatoes are heated through.  Sprinkle with cilantro and serve with tortillas and optional sour cream and salsa verde.

Yield: 4 Servings
Source: Adapted from Pink Parsley, originally from Mexican Everyday
Continue reading...

Friday, October 29, 2010

What's Baking Challenge - Fall Cupcakes


Print

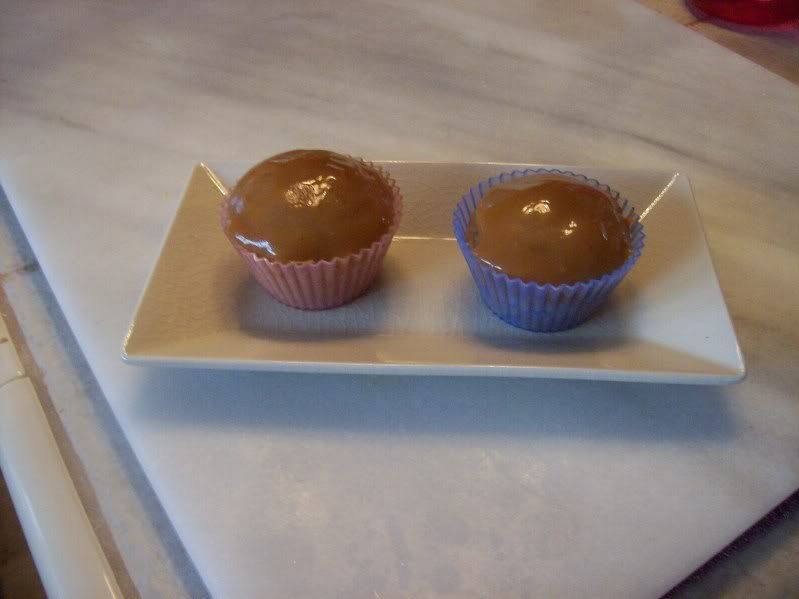
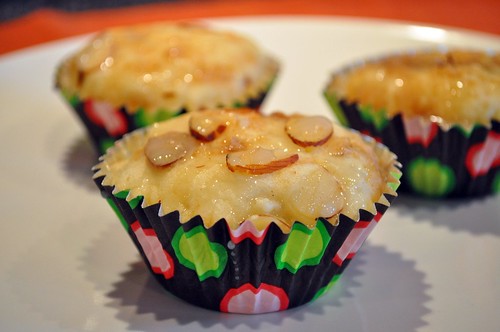
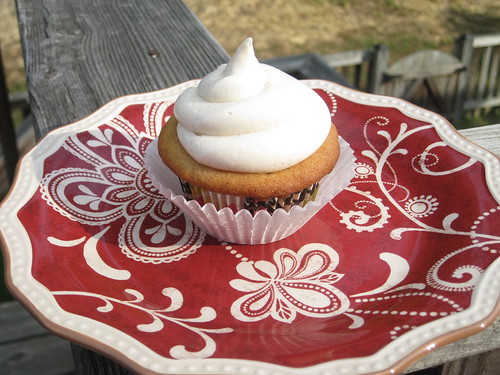
So y'all probably remember me mentioning the What's Baking challenge a group of us recently started up, right?!  If you don't, maybe these will jog your memory!

Well, it's that time of the month where we do a round-up of the recipes everyone made (pictures included)!  It was so much fun to see what everyone came up and while I was trying to be different with my recipe, it turns out that I wasn't the only one thinking that way!  But even though a lot of us made similar items, all of our recipes are unique and different in their own way, which is still really cool!

Definitely check out these other goodies my fellow foodie friends came up with and definitely feel free to check out the rest of their blogs too!  And stay tuned for next month's challenge: Thanksgiving!  Catherine, from Pursuing Domestic Goddess-ness, will be hosting and it will be fun to see what we all come up with and how we interpret Thanksgiving into baked goodies!

Vanilla Pumpkin Spice Cupcakes with Cinnamon Buttercream

Source: The Boys Made Me Do It


Caramel Apple Cupcakes

Source: Pursuing Domestic Goddess-ness


Amaretto Apple Streusel Cupcakes

Source: The Mess Pot


Caramel Apple Cupcakes

Source: Brownies and Blondies


Pumpkin Spice Cupcakes with Maple Cream Cheese Frosting

Source: A Jey In The Life


Caramel Apple Cupcakes

Source: Our Italian Kitchen


Pumpkin Cheesecake Iced Spiced Cupcakes

Source: The Martin Family


Cranberry White Chocolate Cupcakes

Source: Beantown Baker


Maple Rum Pumpkin Cupcakes

Source: Carrie's Sweet Life


Apple Cupcakes with Cinnamon Swirl & Maple Cream Cheese Frosting

Source: Our Share of the Harvest


Pecan Pie Cupcakes

Source: Flourish


Amaretto Apple Streusel Cupcakes

Source: The Transplanted Peach


Spiced Cupcake with Spiced Cream Cheese

Source: Cloud 8 1/2


Caramel Apple Cupcakes with Caramel Icing

Source: Hezzi-D's Books and Cooks
Continue reading...

Tuesday, October 26, 2010

Squash Bisque


Print

One thing you'll probably notice a lot of in the next couple of months are soup recipes.  This is the perfect season to make them and not feel bad about eating a hearty and rich homemade soup...there's actually nothing more comforting in my opinion!  And there is such an abundance of wonderful ingredients right now that can be taken full advantage of, especially squash!

Don't get me wrong, we definitely eat squash in the Summer as well (it's absolutely fabulous on the grill), but there are different types of squash for that and it's rather challenging to find a good Butternut or Acorn squash mid-July.  But right now they are in full force and at their pique, meaning they are perfect for eating!

I love the stuff and it definitely holds it's place as a nice side dish or even as the main star at dinner as in this case with the bisque.  This was my first time trying this particular recipe but I liked that it used a few other ingredients that are not found in my usual go-to recipe.  With a combination of sauteed onion, potato and apple, there was a nice balance of sweet and savory going on this dish.  Normally, sage is paired with something like this; however I was out and opted for rosemary instead and was pleasantly surprised with how much more I liked it over the sage!  Chris was also quite surprised at how much he liked it and determined it to be at the top of his list of favorites!

Squash Bisque

Ingredients
5 Tbsp. Unsalted Butter
1 Med. Onion, diced
2 Med. Apples, peeled and diced
1 Lg. Potato, peeled and diced
2-3 lb. Butternut Squash, peeled, seeded and diced
Salt
Pepper
1/2 Tsp. Dried Rosemary (or Sage)
2 Tbsp. Flour
1/2 cup Apple Cider
4 cups Chicken Broth
1/2 cup Milk
1/2 cup Heavy Cream
2 cups Cheddar Cheese, shredded

Directions
In a large pot, melt the butter over medium heat and add in the onion, apples, potato and squash.  Season with salt and pepper and cook until the onions become tender (about 10-12 minutes).  Stir in the rosemary (or sage) and flour.  Add in the cider, stirring occasionally until thickened.  Add in the broth, milk and cream; cover and bring to a boil.  Reduce heat and simmer for 20 minutes.

Using a potato masher, carefully begin mashing the chunks of potato and squash in the pot to form a thicker consistency.  Add in the cheese, stirring until melted in.  Serve immediately.

Yield: 4-6 Servings
Source: Adapted from Food Network Magazine
Continue reading...

Monday, October 25, 2010

Caramel Apple Cupcakes - What's Baking Challenge


Print

Recently, another foodie friend of mine, Carrie, mentioned she was interested in putting together a monthly baking challenge, so several of us got together and worked out all of the kinks and came up with a group called, What's Baking!  Each month, one person will be designated to pick a theme and each of us has to come up with our own interpretation and bake something yummy.  This is our first month and the theme chosen was Fall Cupcakes.

Seems easy enough, right?  Wrong.  I had a million ideas of what I wanted to do.  Pumpkin, of course, topped that list along with apples.  I wanted to do something different.  Something that I've never made before but something that would be easy enough for readers to follow along with and something that would be delicious.  I had narrowed it down to two ideas one being pumpkin and the other apple.  So I relied on my handy decision-maker, Chris!  Being a hard choice for him to make, we mutually agreed that the Caramel Apple Cupcakes would be a wonderful way to celebrate this challenge. 


I mean, everyone loves cupcakes (they're all the craze right now) and who doesn't love a good caramel apple?!  So, I rounded up my ingredients and went off baking.  When they first came together, I was worried that they'd be more like muffins but the texture is very cake-like and the flavor is very apple-y and the caramel (and peanuts) on top made for a delightful translation of the real thing into a cupcake!  I know some have preferences of how they like them...some like 'em just the way they are with plain caramel and others prefer them "dressed" up a bit with chopped nuts, sprinkles, chocolate chips, a little icing drizzled over them....  So I decided to do a mixture of both the original style and some with chopped peanuts on top!  I can pretty much sum these up with one word: YUM!


Caramel Apple Cupcakes

Ingredients
1 1/4 cups Flour
2 Tsp. Baking Powder
1/2 Tsp. Cinnamon
1/2 Tsp. Salt
2 Eggs
1/2 cup Brown Sugar, packed
1/2 cup Sugar
1/2 cup Vegetable Oil
2 Tsp. Vanilla Extract
2 Apples, peeled and shredded
25 Caramels, unwrapped
2 Tbsp. Heavy Cream
Chopped Peanuts (optional)

Directions
Preheat oven to 350 degrees.  Line muffin/cupcake pan with liners.

In a medium bowl, whisk together the flour, baking powder, cinnamon and salt; set aside.

In a large bowl, whisk together the eggs, brown sugar and sugar.  Add in the vegetable oil and vanilla, whisking in between each addition; mix until well combined.  Add in half of the flour mixture to the egg mixture, whisking until well combined.  Add in the remaining flour mixture and whisk until blended.  Add in the apple and mix in until it's incorporated throughout the batter.  **Be sure to to place the shredded apple in a dish cloth and squeeze the juice out of it so it doesn't make the batter runny**

Using an ice cream scoop, fill the cupcake liners with the batter almost to the top.  Bake for 25 minutes or until a toothpick inserted in the center comes out clean.  Let cool.

In a double boiler, melt the caramel and heavy cream over med-high heat.  Stir constantly until it forms a smooth and creamy consistency.  Carefully spread the caramel over the tops of the cupcakes and top with chopped nuts, sprinkles, chocolate chips or whatever your heart desires!

Yield: 12 Servings
Source: Adapted from Everyday with Rachael Ray
Continue reading...

Monday, October 18, 2010

Homemade Oreos - Power of Pink Challenge


Print

As you all know, October is a month of celebration for many reasons: Halloween, the beginning of Fall (at least in my eyes), the time for cooking comforting foods, the time for baking all things pumpkin/apple/cranberry-related, and it's Breast Cancer Awareness month. 

Did you know that 1 in 8 women will get breast cancer within their lifetime?  With statistics like that, most of us (if not all of us) know or have known at least someone who has experienced this dreadful disease.  And if you don't know anyone who has, then chances are, you probably will.  In fact, in 2010 alone, it is estimated that over 209,000 people will get diagnosed with breast cancer (men included).  That's a scary statistic!

It is so crucial for us to all do our part in supporting and helping with the awareness of Breast Cancer.  You never know how it could affect you...your Mom, Sister, Aunt, Grandmother, Cousin, Best Friend, Dad, Brother or even you.  That's why when my friend, Jen, posted about her Power of Pink Challenge, I knew that I wanted to be a part of it.  If we can be successful in touching even 1% of our readers' lives and encouraging them to be proactive about this deadly disease, then I feel like I've done something.  While it may not be enough, it's still 1% more than what I had done yesterday. 

Jen, the creative brains behind Beantown Baker, has challenged all of her fellow bloggers to create something PINK!  By the way, if you haven't checked out her blog yet, please, please do so!  She is one of the first bloggers I started to follow and she is one who inspired me to start blogging as well (she's also gone pink for the month, so definitely check it out when you get the opportunity)! 

Jen is going on her 3rd year of doing this challenge (you can see some of the ideas others have posted the last couple of years here), so naturally, I wanted to do something different and something she didn't already have from years before.  That was my biggest challenge.  I could've made it easy and did a simple sugar cookie cutout with pink frosting or M&M cookies with pink M&M's.  But those have been done and they're too predictable.  And then it finally hit me as I was going through loads of recipes in my cookbooks and Google Reader....OREOS.  I decided to to make homemade Oreos and dye the best part of them pink!  I had been eyeing the recipe for quite some time but just never got around to making them and this weekend was finally the end to that.

Oh.My.Goodness.  I cannot believe how much these taste like the real thing!  They are practically the real deal and with a few tweaks, they could definitely give the store-bought packaged cookie a run for their money.  They're definitely a close call; however, the cookie portion was a little soft for my liking.  I mean, Oreos have the hard, crunchy outer layer of chocolate cookie with the soft, velvet-like cream center.  The cream center in these bad boys was dead on.  But the cookie itself was a little "off" and if you're going to make them, I would recommend going much smaller than what I did.  I didn't have anything small enough and ended up using a round cookie cutter, but they're just waaayyy too big and overly sweet for our taste buds when they're like that.  But all in all, a fabulous cookie and definitely something to make again!


Homemade Oreos

Ingredients - Cookie
2 1/2 cups Flour
1/2 cup Dutch-Process Cocoa Powder
1/2 Tsp. Salt
1 cup Unsalted Butter
1 cup Sugar
1 Egg
1 Tsp. Vanilla Extract
Directions
Preheat oven to 350 degrees.  Line baking sheets with parchment paper.
In a medium bowl, whisk together the flour, cocoa powder and salt; set aside.

In a large bowl, cream together the butter and sugar until light and fluffy.  Add in the egg and vanilla; beat until well combined.  Add 1/3 of the flour mixture to the cream mixture, beating on low until combined.  Add in the remaining flour mixture (1/3 at a time), mixing in between until both mixtures are combined together.
On a lightly floured surface, roll out the dough until it's 1/2-inch thick.  Using a cookie cutter in the shape of your choice, begin cutting out the dough and placing on parchment-lined baking sheets.  Place baking sheet in freezer for 5 minutes and then bake for 8 minutes.  Let cool completely. 

Ingredients - Cream Filling
1/4 cup Unsalted Butter, at room temperature
1/4 cup Vegetable Shortening
2 cups Powdered Sugar
2 Tsp. Vanilla Extract
Food Coloring (optional)
 
Directions
In a medium bowl, beat together the butter and shortening.  Gradually add in the powdered sugar and vanilla.  Continue mixing until light and fluffy.  If dyeing the cream, add in the food coloring to achieve the desired color.


Place the cream filling in a pastry bag or resealable bag with the tip cut off and begin assembling the cookies by piping a large amount of cream into the center of one cookie.  Top with another cookie of equal size and gently press down so the cream filling spreads out to the edges.  Continue this process until all of the cookies have been assembled.

Yield: 18 Large Cookies
Source: Cookies adapted from Bake at 350, originally from Cookie Craft;  Cream Filling adapted from Smitten Kitchen, originally from Retro Desserts
Continue reading...
 

With a Cherry on Top Copyright © 2009 Designed by Ipietoon Blogger Template In collaboration with fifa
Cake Illustration Copyrighted to Clarice