Pages

Monday, December 13, 2010

Zuppa Toscana


Print

If one were to question whether Winter had arrived yet in Georgia, they need not question it any longer!  It was frigid and down-right freezing here over the weekend and we saw snow fly! 

Now, being a "Yankee" myself, snow and frigid temperatures are nothing out of the ordinary for me at this time of year (especially since my family has already seen blizzard-like conditions where they live).  But when you live in the South, especially getting down past Tennessee and Kentucky, you would expect that you've escaped that horrible weather!  Well let me assure you...that's a big fat NO!

But what is December without being a little cold and seeing Mother Nature's frozen little stars falling from the sky?!  And what better way to celebrate weather like that than to curl up to a nice bowl of homemade soup?!  I'll do you one better, how about a nice bowl of Zuppa Tuscana from Olive Garden?!  And even better than that...a bowl of Zuppa Toscana homemade from your own kitchen!

Olive Garden: home of the infamous soup, salad and breadsticks special.  One that I know I officially partook in plenty of times at lunch gatherings!  As always, I feasted on the yummy salad with homemade Italian dressing, buttery garlic breadsticks and piping hot Zuppa Toscana with chunks of potatoes, spicy sausage and fresh kale in a creamy broth....YUM!  Seriously, if you've never tried it, you must go and get some.  Now!  I really mean now!!!

Surprisingly, Chris had never had it, but that's because when he goes to Olive Garden, he orders pasta.  Hmmm...who would've thought?!  So to my delight, he was pleasantly surprised after trying this hearty soup and even took some for lunch today!  As one of my definite favorites, this soup will surely be greeted with big open arms in our house again (probably sooner than we think)!


Zuppa Toscana

Ingredients
1 lb. Italian Sausage
8 slices Bacon, chopped
4 cups Water
2 cups Chicken Broth
2 Lg. Potatoes (Yukon, Russet, Baking, etc.), cubed
1 Med. Onion, diced
4 cloves Garlic, minced
2 cups Kale, chopped
1 cup Heavy Cream
Salt to taste
Pepper to taste
1/2 Tsp. Red Pepper Flakes (optional)

Directions
In a large pot, crumble the sausage and brown over medium heat.  Add in the bacon and cook, stirring frequently, until browned; drain the grease from the pot.

Add in the water, chicken broth, potatoes, onion and garlic.  Cook over medium heat until simmering; let simmer until the potatoes are fork-tender (about 10-15 minutes).

Add in the kale, cream, salt, pepper and red pepper flakes; stir until combined and cook until heated through.  Serve immediately.

Note: The red pepper flakes definitely add a bit of heat to the soup, so use sparingly if you prefer less or omit altogether.


Yield: 4-6 Servings
Source: Adapted from Joelen's Culinary Adventures, originally from America's Most Wanted Recipes
Continue reading...

Tuesday, December 7, 2010

Starbucks' Pumpkin Scones


Print

Have y'all been to Starbucks and had their Pumpkin Scones?!  They're heavenly and with a Pumpkin Spice Latte (especially with Autumn's first sign of arrival), it's pumpkin overload, but in a good way!  A really good way!  I don't know if I've ever talked about my Starbucks craziness or my little method of how I choose my drinks from there, but I'll keep it short....

When it gets to be the time of year that Autumn is arriving, I always go for the Pumpkin Spice Latte (and sometimes treat myself to the decadent Pumpkin Scone or the low fat Banana Chocolate Chip Coffee Cake, which is also scrumptious).  Then, as Fall moves out and Winter quickly approaches, my  mind goes directly to the Peppermint White Mocha, which is oh so good!  Any other time of the year, my go-to drink is just a regular White Mocha but when it's my favorite time(s) of the year, I splurge and get something special!

Sorry, I digress a little.  Back to the scones....I came across this recipe, I don't know, quite some time ago and had it bookmarked on my computer ever since.  I've made pumpkin scones before...remember these?  They were good, but nothing beats the ones from Starbucks.  There are so many copycat recipes out there (and I've tried a few), but they don't always meet your expectations of the real thing.  This recipe, however, was quite the opposite.  These scones turned out exactly like Starbucks' and the sugary white icing drizzled over them was the cherry on top...haha, get it?!

I actually made mini-scones because, along with the Cranberry Soda Bread with Lime Glaze and the Mini- Zucchini & Basil Quiches, I took these into work for Black Friday.  I figured it would be easy to grab a small one versus a much larger one and they went a lot further and saved me time from having to make duplicate batches of scones just to feed everyone!  They're great in the morning with coffee or tea and sometimes I even found myself snacking on them in the evening just to curb my sweet tooth!

Starbucks' Pumpkin Scones

Ingredients
2 cups Flour
7 Tbsp. Sugar
1 Tbsp. Baking Powder
1/2 Tsp. Salt
1/2 Tsp. Ground Cinnamon
1/2 Tsp. Nutmeg
1/2 cup Canned Pumpkin
3 Tbsp. Heavy Cream
1 Egg
6 Tbsp. Unsalted Butter, cold and cubed
1 cup plus 1 Tbsp. Powdered Sugar
2 Tbsp. Milk

Directions
Preheat oven to 425 degrees.

In a large bowl, whisk together the flour, sugar, baking powder, salt, cinnamon and nutmeg; set aside.

Meanwhile, in a medium bowl, whisk together the pumpkin, heavy cream, and egg.

Crumble the butter into the dry ingredients until it resembles a coarse mixture.  Fold the wet ingredients into the dry ingredients. 

Using your hands, for the dough into a ball.  Pat the dough lightly onto a floured surface and form a 1-inch thick rectangle (9-inches long and 3-inches wide).  Using a large knife or pizza cutter, slice the dough twice through the width, making three equal portions.  Cut those pieces diagonally so that there are 6 triangles of dough (I took it even further to make smaller, mini-size pieces).

Bake on a parchment lined baking sheet for 14-16 minutes or until light brown; let cool completely.

To make the icing, combine the powdered sugar and milk in a small bowl; mix well until no lumps are present.  Using a spoon, carefully drizzle the icing over the scones and let sit for at least 1 hour.

Yield: 6 Servings (full size)/24 Servings (mini)
Source: Adapted from The Nest
Continue reading...

Monday, December 6, 2010

Cranberry Soda Bread with Lime Glaze


Print

I'm not a big "bread" person in terms of actually baking bread.  I don't know, it sort of scares me!  I've made homemade bread before and it always just turns out alright.  It's never anything special, but it's certainly not horrible either.  I've just always envisioned homemade bread as being really, really good.  And the times that I've had it, it is!  This is definitely a cooking hurdle I need to get over and I'm working on it. 

I think, more than anything, it's working with yeast that scares me.  Making bread can be a delicate process; there are a lot of steps in between to let the bread rise (sometimes more than once) and kneading it just so.  For one reason or another, mine usually comes out dry.

This recipe I actually consider a "cheater" recipe in that it doesn't utilize yeast.  It's quite simple and ends up coming out as a cross between a scone and biscotti.  It has a hard shell on the outside, but is rather dense on the inside.  I made this recipe for work on Black Friday.  I thought it would be a nice little "something" to help fill us up but also kill our sweet cravings!

The bread itself was pretty good, although it did seem a little dry (not too bad), but I might've overbaked it as well (again, if you've followed any of my other Turkey Day/Black Friday posts, you'll know that I had lots going on in the oven and some things ended up staying in there too long)!  And I missed a step in the process to help vent it and let steam escape during baking.  It certainly didn't ruin the flavor and the best part of this recipe is the lime glaze!  Holy smokes, people, I'm telling you that I could not keep my hands off of the glaze once I was done using it on the bread.  It was so good and just that hint of lime was really refreshing and such a nice complement to the somewhat sweet, yet somewhat tart cranberries in the bread.  It was a really  nice combination and if I make it again, I will definitely be sure not to overbake it!  I think this bread would be great for a bridal or baby shower of some sort or perhaps a brunch!

Cranberry Soda Bread with Lime Glaze

Ingredients
1 1/3 cups plus 1 Tbsp. Milk
1 Tbsp. Lemon Juice
4 cups Flour
1 1/2 Tsp. Baking Soda
1 Tsp. Salt
3 Tbsp. Unsalted Butter, chilled and cubed
1 cup Dried Cranberries
1 Egg
1 cup Powdered Sugar
1 Lime, zested and juiced

Directions
Preheat oven to 425 degrees.  Line a baking sheet with parchment paper.

In a small bowl, whisk together 1 1/3 cups milk and the lemon juice; let it sit at room temperature for 10 minutes.

In a large bowl, combine the flour, baking soda and salt.  Rub in the butter until coarse crumbs form.  Stir in the cranberries.

Beat the egg into the milk mixture and then add to the flour mixture, mixing until just combined.  Transfer the dough to a lightly floured surface and knead until it just comes together.  Form the dough into an 8-inch round and place on the prepared baking sheet.  Using a knife, score an "X" 1/2-inch deep in the center.  Bake until golden and crusty (about 25-30 minutes).  Let cool completely.

Meanwhile, in a medium bowl, combine the powdered sugar, lime zest, lime juice and the remaining tablespoon of milk.  Drizzle over the cooled bread and slice for serving.

Yield: 8-12 Servings

Continue reading...

Friday, December 3, 2010

What's Baking Challenge - Thanksgiving


Print

Well, it's that time again and I can hardly believe we're already rounding up recipes from last month's What's Baking Challenge (it seems like just about a week ago, we were doing our first round up for October).  Wow, how time flies!

This was an interesting month because it was about Thanksgiving and it was really nice to see everyone's interpretations of the theme and what reminded them of this special holiday.  It was also nice to see a wide variety of baked goods made and not just desserts! 

Below are the entries from most everyone (I know that some people stepped out for the month due to time commitments)...hopefully you'll find something that catches your eye and also some other blogs that may be of interest to you!

And before I go, our host chosen for December is Stephanie from Brownies and Blondies.  The theme she has chosen is Holiday Colors!  I think it will be really fun to see how everyone interprets it and whether they stick with the typical red and green for Christmas, blue and white for Hanukkah, red/green/black for Kwanzaa, black and gold for New Years Eve, a simple red and white combination or maybe even something Wintry in light blue/silver/white!  Stay tuned next month to find out....


Edible Cornucopia


Source: Our Italian Kitchen


Rustic Apple Crostata


Source: The Boys Made Me Do It


Pumpkin Cranberry Pecan Upside Down Cake


Source: Beantown Baker


"The Pie That Won't Die"


Souce: The Tiny Tyrant's Kitchen


Cranberry Apple Mini Pies


Source: Hezzi-D's Books and Cooks


Sweet Potato Trifle


Source: Carrie's Sweet Life


Bacon and Cheddar Apple Pie


Source: The Jey of Cooking


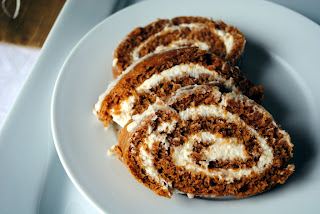
Pumpkin Roll with Cream Cheese Filling


Source: Our Share of the Harvest


Pilgrim Bread


Source: Pursuing Domestic Goddess-ness


**For what it's worth, please excuse the formatting above with the caption sourcing of the pictures.  Blogger isn't working with me the way I'd like and for some reason some of the captions are not properly placed under each picture.  I'll keep working on it to hopefully get it fixed!


Continue reading...

Thursday, December 2, 2010

Mini-Zucchini & Basil Quiche


Print

We all know that Black Friday happens to be the craziest and busiest shopping day of the year.  I never, let me repeat, never go out that day! 

But unfortunately, my streak of not going out on Black Friday ended this year.  You see, I picked up a part-time job this Fall to help get me out of the house, meeting new people here and just having something to do.  That job happens to be in retail (one of my loves)!  I love shopping and I love working in retail so what better way to fill my days than doing something I love...not everyone gets that opportunity.

Back to Black Friday....so in all of the years I worked my hand in retail, I always lucked out and never had to work this dreaded day.  Until now.  We were open for 22 hours straight and I was scheduled from 11:45p-7:30a. 

So, Thanksgiving night, I had to go into work.  After spending all day in the kitchen.  After stuffing my face with food.  After all of that, I had to go into work waaaayyyy past my bedtime! 

Believe it or not, it was actually fun and not as bad as I thought!  I'm glad, though, that I was on the other side of the coin working the holiday as opposed to actually shopping it.  But all in all, I made it, I had fun and I made a little extra money!

Unfortunately, because we were open practically all day and really busy, we really didn't have the opportunity to get out for our breaks, so everyone was tasked with bringing in items to eat to help replenish and reboost our energy levels throughout the morning, day and night.  I decided to bring in a few different things: scones, soda bread and mini-quiches.  Oh my goodness, I cannot even begin to tell you how good these little quiches were!  I'm not normally a fan of egg-y type dishes, especially quiche, but these definitely changed my mind. 

The flavor combination of sweet basil and zucchini with tangy Parmesan cheese and light, fluffy eggs provided our mouths were the perfect bite of sweet, creamy and tangy goodness!  And they're crustless, which was really nice and convenient for popping in your mouth!  These were so good that Chris and I couldn't keep our hands off of them, so I had to make another batch to take into work that night!

Mini-Zucchini & Basil Quiche

Ingredients
1/4 cup Cornstarch
1 1/4 cup Milk
2 Eggs
2 Egg Yolks
1 cup Heavy Cream
3/4 Tsp. Salt
1/8 Tsp. Nutmeg
Cooking Spray
Olive Oil
4 Garlic Cloves, minced
1/2 Onion, diced finely
2 Zucchini, grated
1/4 cup Parmesan Cheese, grated
Fresh Basil, chopped finely

Directions
Pre-heat oven to 450 degrees.

In a medium bowl, whisk together the cornstarch and 1/2 cup of milk until smooth.  Add in the whole eggs and egg yolks, whisking again, until smooth.  Gradually add in the remaining milk, cream, salt and nutmeg; whisk until combined.  Refrigerated until ready to use.

In a large skillet, heat olive oil over med-high heat.  Add in the garlic and onion; saute until fragrant (about 2 minutes).  Add in the zucchini and cook until just softened (about 4 minutes).  Remove from heat.

Spray a mini-muffin tin with cooking spray.  Place a pinch of cheese in the bottom of each cup, topping it with a teaspoon helping of the zucchini mixture and a pinch of basil.  Pour a tablespoon helping of the egg mixture into each cup.

Bake for 15-18 minutes or until the quiches begin to puff up and turn golden brown.  Let cool for 10 minutes and carefully run a butter knife around the rim of each cup to gently lift each quiche out.

**These quiches freeze very well in a sealed Ziploc bag or resealable container.  If heating from frozen state, place them on a cookie sheet and bake for 5-10 minutes at 400 degrees.

Yields: 48 Quiches
Source: Adapted from The Kitchn, originally adapted from Fine Cooking Magazine
Continue reading...

Wednesday, December 1, 2010

Spinach & Artichoke Dip


Print

Rounding out the list of appetizers we had on Turkey Day is this recipe for Spinach & Artichoke Dip.  I've definitely had my fair share of the dip and have tried my hand at a variety of recipes including those that are super easy and require very few ingredients to others that are much more complex, ingredient-heavy and time consuming.  This particular recipe falls right in the middle.  It's actually fairly easy to throw together and in fact, the lengthy part is the baking process. 

This recipe is yet another from the infamous Grand Temptations cookbook....don't you ever get tired of me talking about it?!  I've had that book for years and still haven't made every single recipe in it, so I knew it was time to indulge in this particular one, especially since I've been eyeing it for quite some time.  I'm not really sure why I never made it before, but I can definitely say that this, by far, is the best recipe I've made for Spinach & Artichoke Dip!

It's super creamy, a little rich (but not too heavy) and has the right amount and balance of spinach, artichokes, cheese and garlic.  Served with tortilla chips, crackers, bread or even veggies, this particular recipe is definitely sure to please at any gathering!

Spinach & Artichoke Dip

Ingredients
2 Tbsp. Olive Oil
12 oz. Fresh Baby Spinach
1 - 15oz. jar Artichokes, drained and chopped
1/2 Med. Onion, diced
1 1/3 cups Parmesan Cheese, grated
5 Garlic Cloves, minced
3/4 cup Fresh Basil, chopped
12 oz. Cream Cheese, softened
Salt to taste
Pepper to taste
Parmesan Cheese, shredded

Directions
Preheat the oven to 400 degrees.

In a large skillet, heat the olive oil over med-high heat.  Add the spinach to the pan in batches until it wilts down.  Remove from the heat and chop it up once it's cool to the touch.

In a medium bowl, mix together the spinach, artichokes, onion, grated Parmesan cheese, garlic, basil, cream cheese, salt and pepper.  Spoon the mixture into a baking dish and sprinkle with shredded Parmesan cheese.

Microwave on high for 45 seconds and then bake for 20-25 minutes or until golden brown.  Serve with crackers, chips, bread or vegetables.

Yield: 10 Servings
Source: Adapted from Grand Temptations

Continue reading...

Tuesday, November 30, 2010

"Classic" Stuffed Mushrooms


Print

Adding to the list of yummy Thanksgiving apps this year were Stuffed Mushrooms.  I love, love, love stuffed mushrooms of practically any sort and it had been quite some time since I've sunk my teeth into one, so it was only right to make them for this food-filled holiday!

This is actually a very classic recipe and what some would refer to as the "original."  There are so many variations out there now for stuffed mushroom recipes that it can sometimes be hard to find one that is different, yet appealing to all palettes.  You can stuff them with crab, an assortment of cheeses, potatoes, different types of meat, etc.  When in doubt, I always refer to the tried and true, the classic, the original, the big guy...you get the point, I'm sure.

With a healthy (not waist-healthy but portion-healthy or size-healthy, if you rather) bite of sausage, cream cheese and Parmesan cheese stuffed into a juicy mushroom, your mouth explodes with depths of flavor and textures...it's pleasing in so many ways!  They're such a savory and slightly rich addition, that you don't need too many which is why this recipe can go a long way with guests, even leaving enough for seconds or thirds!

Oh and for what it's worth, please don't mind my picture...I accidentally left them in the oven too long!  Even after my timer told me it was time for them to come out, I was preoccupied with other kitchen tasks....who am I kidding?  I was stuffing my face "taste-testing" other yummies I was working on!  Irregardless, they were still good and we devoured every.single.one!

"Classic" Stuffed Mushrooms

Ingredients
24 oz. Button Mushrooms
1/2 lb. Pork Sausage (whatever flavor you like...I used Italian)
1/2 Med. Onion, diced
4 cloves Garlic, minced
1/3 cup Chicken Broth
8 oz. Cream Cheese, softened
1 whole Egg Yolk
3/4 cup Parmesan Cheese, grated
Salt to taste
Pepper to taste

Directions
Preheat oven to 350 degrees.

Gently wipe off mushrooms with a damp cloth or paper towel to remove dirt.  Pop out the stems, reserving both parts.

Chop up the stems into fine pieces and set aside.

In a skillet, cook the sausage over med-high heat until browned; drain the grease and transfer meat to a plate to set aside.

Meanwhile, add the onions and garlic to the skillet and cook over medium heat until softened (about 2 minutes).    Pour chicken broth into the skillet and deglaze the pan by running a whisk or spoon around the bottom of the pan to scrape up any bits left behind by the meat.  Continue cooking until liquid evaporates (about 5-7 minutes).  Add in the mushroom stems and cook to soften (about 2 minutes).  Remove from heat and set aside to cool.

In a medium bowl, mix together the cream cheese and egg yolk.  Add in the Parmesan cheese and mix until combined well.  Add in meat and mushroom mixture and mix well.  Refrigerate the mixture, allowing it to firm up (about 20 minutes).

When ready, smear the sausage mixture into each button cap cavity, allowing a generous amount to sit on top.  Place stuffed mushrooms on a baking sheet and bake for 20-25 minutes (or until golden brown).


Yield: 12-16 Servings
Source: Adapted from The Pioneer Woman
Continue reading...

Monday, November 29, 2010

Sausage Cups


Print

Happy post-Thanksgiving Day everyone!  I hope everyone survived the holiday and Black Friday madness (if you were crazy enough to get out in it)! 

Because our families live in other states, Chris and I spent Turkey Day at home, together, this year.  It was really nice with just the two of us and definitely complete with all the fixins!  We had the usual roast turkey, dressing, mashed potatoes and gravy, etc.  But I also made a few appetizers to help fill us up even more throughout the day! 

I decided to make new appetizers this year utilizing recipes that I haven't made before and I'm so glad I gave these Sausage Cups a place at the table this year.  They were the perfect mouthful of crunchy, chewy, spicy cheesiness!  And they were so easy to put together...they practically took no time at all!  And believe it or not, they're just as good leftover! 

This is such a versatile recipe and you really can change up the variation of flavors by changing out the ingredients you use!  I ended up using Italian sausage, but I think they would be dually delicious substituted with Hot sausage, ground chicken or ground turkey as well (especially if you're trying to avoid the heavy calories and flavors the sausage gives).  The original recipe called for a blend of Monterrey jack and cheddar cheese but I used what I had on-hand.  Either way, any mixture of cheese would work just fine!

We actually enjoyed these so much, I decided to make another batch of them today just to have for a snack and also to freeze them!

Sausage Cups

Ingredients
1 lb. Ground Sausage
1 pkg. Won Ton Wrappers
2 cups Cheddar Cheese, shredded
1/2 cup Ranch Dressing

Directions
Preheat oven to 350 degrees.  Spray a mini-muffin tin and set aside.

In a skillet over med-high heat, crumble the sausage until browned; drain. 

Meanwhile, insert the won ton wrappers into the muffin tin to form little cups or bowls.  Bake for 5 minutes.

In a medium bowl, mix together the sausage, cheese and ranch dressing.  Carefully spoon the mixture into the pre-cooked won ton cups and finish baking for an additional 10 minutes.

Yield: 30 Servings
Source: Adapted from Bob Evans
Continue reading...

Tuesday, November 23, 2010

Apple Pecan Cheesecake - What's Baking Challenge


Print

It's that time again....it's time for the What's Baking Challenge!  First of all, I'm so sorry y'all for being such a slacker on the blog front. Despite how it may look, I really haven't been slacking at home (promise).  We've been very busy and my computer is very, very sick.  I am "temporarily" on Chris' computer for now which is my why my posts have been few and far between.

But it's nearing the end of the month and with that comes the What's Baking Challenge.  If you remember from last month's post, the theme chosen for November is Thanksgiving!  What better way to celebrate Turkey Day than with a non-traditional dessert!  While I love me some pumpkin pie, I'm feeling a little overkill with all of the pumpkin recipes I've been seeing lately.  So I thought I'd liven things up a bit with a cheesecake.  But not just your usual New York cheesecake.  This one has a delightful little mixture of apples and pecans tossed in cinnamon and sugar on top....YUM!

I'm telling you, this is definitely a great alternative (or addition) to the typical dessert fare you see on Thanksgiving.  The cheesecake with the apples and pecans on top really give a warm, comforting feeling in your mouth and really brings it home.  It could definitely stand on it's own at the table next to the turkey and dressing but if you have to go with the traditional T-Day dessert(s), you really should throw this in as an accompaniment...I promise, you won't be disappointed and neither will your guests!

Apple Pecan Cheesecake

Ingredients - Crust
1 1/2 cups Graham Cracker Crumbs
1/4 cup Butter, melted
2 Tbsp. Sugar plus

Ingredients - Cheesecake
4 - 8oz. pkg. Cream Cheese, softened
1 1/2 cups Sugar
1 Tsp. Vanilla
1 cup Sour Cream
4 Eggs
3 Lg. Apples, peeled, seeded and chopped
3/4 cup Pecans, chopped
1 Tsp. Ground Cinnamon

Directions
To make the crust, preheat oven to 325 degrees.  Line a 13x9-inch baking dish with foil. 

In a small bowl, mix together the graham cracker crumbs, butter and sugar.  Press mixture into the bottom of the pan and bake for 10 minutes.

Meanwhile, in a large bowl, beat together the cream cheese, 1 cup of sugar and vanilla until smooth.  Add in sour cream; mix well.  Add eggs, one at a time, beating between additions until blended together. 

In a medium bowl, combine the apples, pecans, remaining sugar and cinnamon.  Mix until the pecans and apples are coated with cinnamon and sugar.

Pour the cheesecake mixture over the cooled graham cracker crust.  Spoon the apples and pecans over the cheesecake mixture and bake for 1 hour. 

Remove from the oven and place in the refrigerator for 4 hours to let cool and set.  Using the foil, pull the cheesecake out of the dish and cut into serving-size squares.


Yield: 16 Servings
Source: Adapted from Kraft Foods
Continue reading...

Thursday, November 11, 2010

Easy Caramel Corn


Print

With Fall, comes tailgating and football parties.  And with tailgating and football parties, comes food (more importantly, snacks).  That's where this recipe comes in!  This is probably the easiest recipe out there for homemade caramel corn (at least from what I've found) and don't let the ease of the recipe fool you: it's just as tasty!


I've been making this caramel corn for years now and it's always been a hit whether I've brought it to work parties, holiday gatherings, giving away as gifts or just making it here at home for something to munch on.  It's also very versatile and can be combined with other goodies such as pecans, candy corn, peanuts, etc. 


Easy Caramel Corn

Ingredients
3 bags Unbuttered Popcorn, popped
1 cup Unsalted Butter
2 cups Brown Sugar, packed
1/2 cup Light Corn Syrup
1/2 Tsp. Baking Soda

Directions
Empty the popcorn into a brown paper bag, being careful to not let the unpopped kernels get in.

In a small saucepan, combine the butter, brown sugar and corn syrup over med-high heat.  Bring to a boil and cook for 5 minutes, stirring constantly.  Remove from the heat and stir in the baking soda.

Pour the caramel over the popcorn in the bag; close the bag and shake well.  Microwave on high for 2 minutes.  Remove and shake well or mix with a wooden spoon so that all of the popcorn is coated in caramel.  Spread over wax paper and let cool. 

**Be careful as it will be very hot coming out of the microwave**


Yield: 14-16 Servings
Source: From Grand Temptations
Continue reading...

Wednesday, November 10, 2010

Cheddar & Jalapeno Popovers


Print

For some reason people always ask about ideas to make alongside a big pot of soup and with all of the soups and stews I've made recently (and with more to come), I've found that the best sides include a nice, green salad and bread of some sort.  Determining what type of salad and/or bread to make to accompany your soup will depend a lot on the ingredients and flavors your soup will have.  Playing up the flavors of your salad and the texture of the bread can really help to complement the soup itself.

To give you an idea, the Squash Bisque I made recently was paired with a salad of romaine, sliced pears, Gorgonzola cheese, dried cranberries, candied pecans and a cider vinaigrette.  Alongside it, was a fresh loaf of French bread, perfect for dipping!  In this case, you could easily add some grilled chicken to the salad to boost up your protein, but I found the soup hearty enough that it wasn't necessary.  This combination provided the perfect Autumn meal while utilizing fresh, in-season ingredients and still rather figure-friendly.

If it's a nice hearty Chili, for instance, I usually opt for a simple green salad with a few fresh veggies and a nice vinaigrette.  To have a little fun and play up the spicy flavors of the chili, I might make a salad utilizing fresh tomatoes, red onion and a cilantro lime vinaigrette (a little Mexican cheese would be great on top as well).  For bread pairings, you can never go wrong with a good old-fashion Southern cornbread!  Mexican cornbread is great as well as is this recipe for Cheddar & Jalapeno Muffins!

I actually made these recently to go alongside a large pot of Chili and it was a nice contrast to the normal cornbread we usually have.  Personally, I thought they could've used a tad more salt than what the recipe called for and next time, I'll definitely add more jalapeno.  But all in all, I really liked them...the only trouble we really ran into was getting them out of the cupcake liners!  I thought I had bought decent liners; they were made by Wilton after all, but to our surprise they stuck terribly to the popovers, making it rather difficult to peel away.  So, unfortunately, remnants of the popovers went to waste but we still managed to work with the best part: the middle!  I guess lesson learned...don't buy Wilton cupcake liners again!


Cheddar & Jalapeno Muffins

Ingredients
3 Eggs
1 1/4 cups Milk
1 1/4 Flour
1/2 Tsp. Salt
3 Tbsp. Unsalted Butter, melted
2 Jalapenos, minced
3/4 cup Cheddar Cheese, shredded

Directions
Preheat the oven to 400 degrees.  Line a muffin tin with cupcake/muffin liners.

In a large bowl, beat the eggs until foamy.  Gradually add in the milk, beating at low speed.  Add in the flour and salt; beat until smooth.  Mix in the butter.

Fill each cup half-full with the batter.  Sprinkle evenly with the cheese and jalapenos and top with more batter, filling the cups up. 

Bake for 45-50 minutes or until brown.  Let cool for 1 minute and serve warm.

Note: The ingredient list above reflects the changes I would make to the recipe, including adding more salt and jalapenos.  The original recipe calls for 1/4 Tsp. of salt and does not include jalapenos.


Yield: 8 Muffins
Source: Adapted from Grand Temptations
Continue reading...

Monday, November 1, 2010

Chorizo, Potato & Mushroom Tacos


Print

I don't think I need to explain my obsession love for Mexican food.  It's pretty cut and dry and something that will probably always be an obsession love of mine.  Next to cheeseburgers and ice cream, it's at the top of my list of favorites!  I mean, usually when we go out for dinner, it's what is on my mind to get (we usually have to choose between Mexican and sushi).  And it doesn't stop there...I love making Mexican-inspired meals at home!

I came across this recipe on Pink Parsley not all that long ago and marked it as one to try.  Each week that I sat down to do my meal planning, this recipe seemed to pop up, but for one reason or another I'd brush it off and tell myself I'd make it another time.  Well ladies and gentlemen, that time has finally come.  And let me be the first to admit what a HUGE mistake it was to put off for so long!  This was, seriously, one of the easiest and tastiest meals I have thrown together in a long time.  I'd have to say it's climbed right up there as one of my top meals (probably right alongside the Creamy Shrimp & Grits)!

The spiciness of the chorizo with the crispy, soft potatoes and sauteed mushrooms make for an explosion of textures and flavors in your mouth.  We served them on real corn tortillas (the best) with a little cilantro, sour cream and salsa verde.  Paired alongside some Spanish Rice and Mexican Fried Corn, this recipe is surely going to find it's way in our regular meal rotation!  Please do me a favor and don't deprive yourself as long as I did from inhaling tasting these!


Chorizo, Potato & Mushroom Tacos

Ingredients
2 Tbsp. Olive Oil
1 Lg. Potato, cubed
1 - 15 oz. pkg. Chorizo, casings removed
1/2 Med. Onion, diced
6 oz. Button Mushrooms, chopped roughly
Salt to taste
Pepper to taste
1/2 cup Cilantro, chopped
Corn Tortillas, warmed
Sour Cream (optional)
Salsa Verde (optional)

Directions
In a large pan, heat olive oil over med-high heat.  Add in the potatoes and cook, stirring frequently, until crisp on the outside (about 7-8 minutes).  Transfer to another dish and set aside.

In the same pan, begin crumbling the chorizo over med-high heat.  Cook, stirring often to break up any large pieces, until heated through (about 5 minutes).  If needed, carefully drain the grease from the pan. 

Add in the onions and mushrooms to the chorizo; cook, stirring occasionally, until tender (about 3 minutes). 

Add in the potatoes to the chorizo mixture and season with salt and pepper to taste.  Cook until the potatoes are heated through.  Sprinkle with cilantro and serve with tortillas and optional sour cream and salsa verde.

Yield: 4 Servings
Source: Adapted from Pink Parsley, originally from Mexican Everyday
Continue reading...

Friday, October 29, 2010

What's Baking Challenge - Fall Cupcakes


Print

So y'all probably remember me mentioning the What's Baking challenge a group of us recently started up, right?!  If you don't, maybe these will jog your memory!

Well, it's that time of the month where we do a round-up of the recipes everyone made (pictures included)!  It was so much fun to see what everyone came up and while I was trying to be different with my recipe, it turns out that I wasn't the only one thinking that way!  But even though a lot of us made similar items, all of our recipes are unique and different in their own way, which is still really cool!

Definitely check out these other goodies my fellow foodie friends came up with and definitely feel free to check out the rest of their blogs too!  And stay tuned for next month's challenge: Thanksgiving!  Catherine, from Pursuing Domestic Goddess-ness, will be hosting and it will be fun to see what we all come up with and how we interpret Thanksgiving into baked goodies!

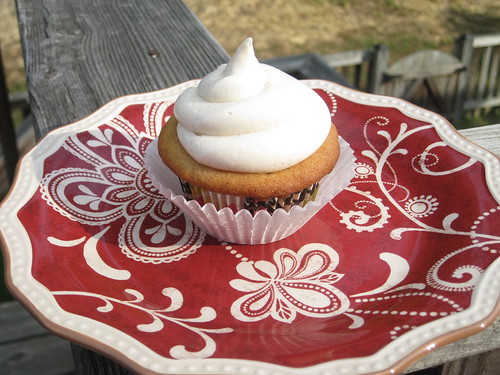
Vanilla Pumpkin Spice Cupcakes with Cinnamon Buttercream

Source: The Boys Made Me Do It


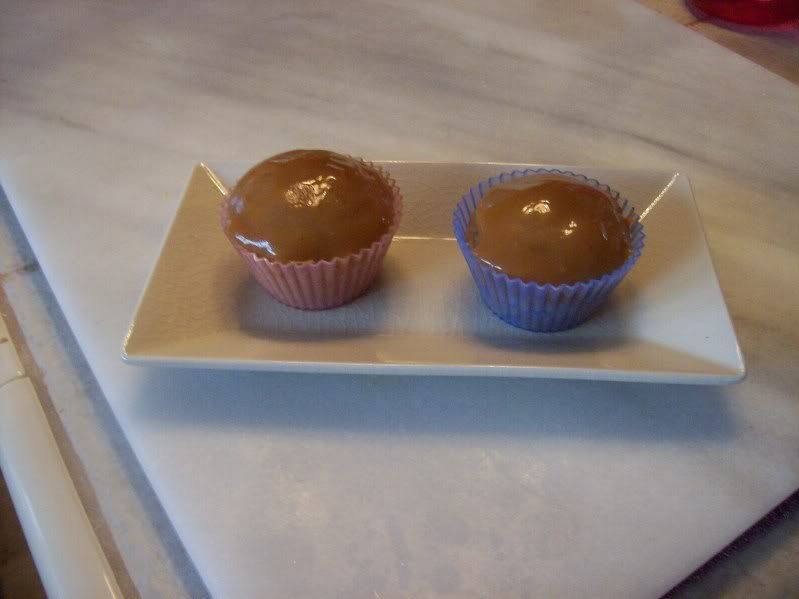
Caramel Apple Cupcakes

Source: Pursuing Domestic Goddess-ness


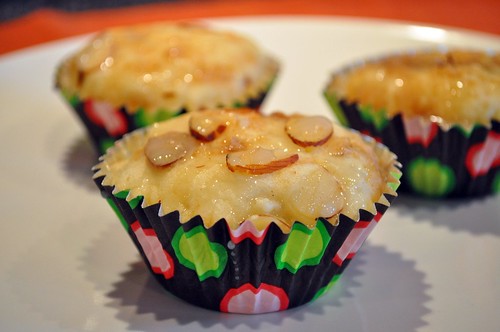
Amaretto Apple Streusel Cupcakes

Source: The Mess Pot


Caramel Apple Cupcakes

Source: Brownies and Blondies


Pumpkin Spice Cupcakes with Maple Cream Cheese Frosting

Source: A Jey In The Life


Caramel Apple Cupcakes

Source: Our Italian Kitchen


Pumpkin Cheesecake Iced Spiced Cupcakes

Source: The Martin Family


Cranberry White Chocolate Cupcakes

Source: Beantown Baker


Maple Rum Pumpkin Cupcakes

Source: Carrie's Sweet Life


Apple Cupcakes with Cinnamon Swirl & Maple Cream Cheese Frosting

Source: Our Share of the Harvest


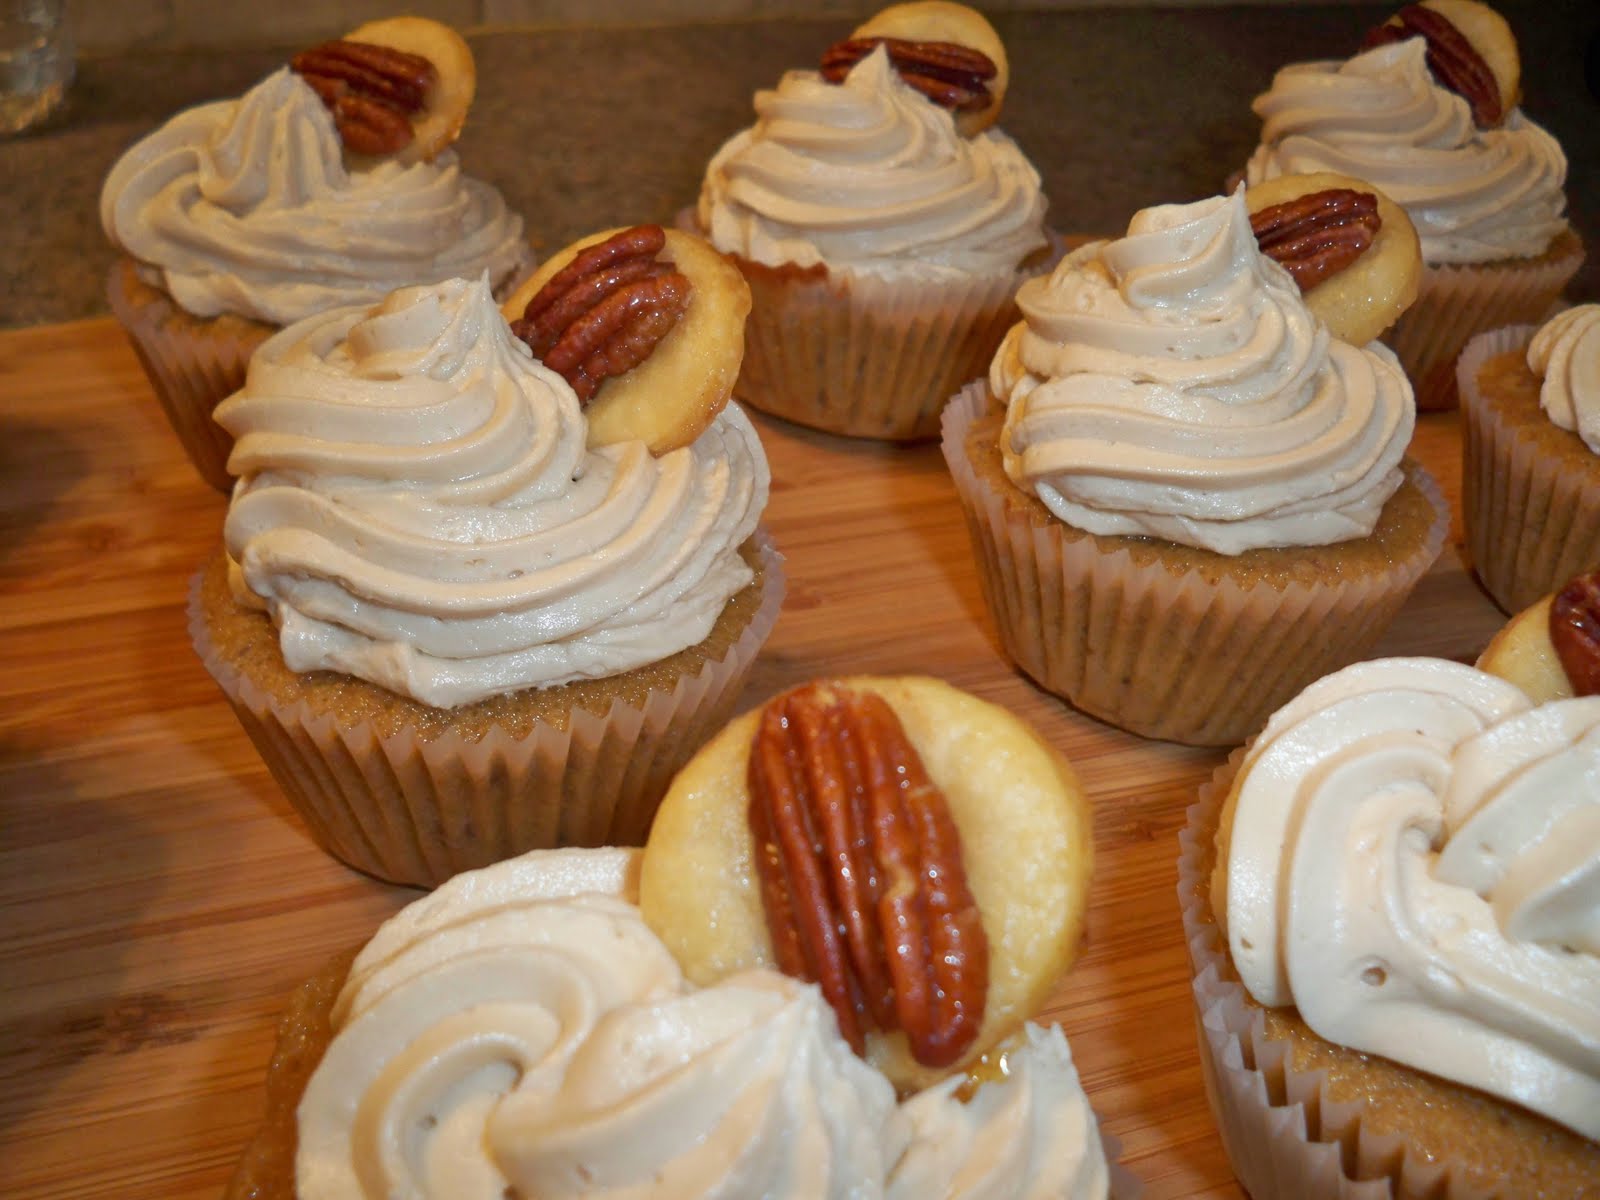
Pecan Pie Cupcakes

Source: Flourish


Amaretto Apple Streusel Cupcakes

Source: The Transplanted Peach


Spiced Cupcake with Spiced Cream Cheese

Source: Cloud 8 1/2


Caramel Apple Cupcakes with Caramel Icing

Source: Hezzi-D's Books and Cooks
Continue reading...

Tuesday, October 26, 2010

Squash Bisque


Print

One thing you'll probably notice a lot of in the next couple of months are soup recipes.  This is the perfect season to make them and not feel bad about eating a hearty and rich homemade soup...there's actually nothing more comforting in my opinion!  And there is such an abundance of wonderful ingredients right now that can be taken full advantage of, especially squash!

Don't get me wrong, we definitely eat squash in the Summer as well (it's absolutely fabulous on the grill), but there are different types of squash for that and it's rather challenging to find a good Butternut or Acorn squash mid-July.  But right now they are in full force and at their pique, meaning they are perfect for eating!

I love the stuff and it definitely holds it's place as a nice side dish or even as the main star at dinner as in this case with the bisque.  This was my first time trying this particular recipe but I liked that it used a few other ingredients that are not found in my usual go-to recipe.  With a combination of sauteed onion, potato and apple, there was a nice balance of sweet and savory going on this dish.  Normally, sage is paired with something like this; however I was out and opted for rosemary instead and was pleasantly surprised with how much more I liked it over the sage!  Chris was also quite surprised at how much he liked it and determined it to be at the top of his list of favorites!

Squash Bisque

Ingredients
5 Tbsp. Unsalted Butter
1 Med. Onion, diced
2 Med. Apples, peeled and diced
1 Lg. Potato, peeled and diced
2-3 lb. Butternut Squash, peeled, seeded and diced
Salt
Pepper
1/2 Tsp. Dried Rosemary (or Sage)
2 Tbsp. Flour
1/2 cup Apple Cider
4 cups Chicken Broth
1/2 cup Milk
1/2 cup Heavy Cream
2 cups Cheddar Cheese, shredded

Directions
In a large pot, melt the butter over medium heat and add in the onion, apples, potato and squash.  Season with salt and pepper and cook until the onions become tender (about 10-12 minutes).  Stir in the rosemary (or sage) and flour.  Add in the cider, stirring occasionally until thickened.  Add in the broth, milk and cream; cover and bring to a boil.  Reduce heat and simmer for 20 minutes.

Using a potato masher, carefully begin mashing the chunks of potato and squash in the pot to form a thicker consistency.  Add in the cheese, stirring until melted in.  Serve immediately.

Yield: 4-6 Servings
Source: Adapted from Food Network Magazine
Continue reading...

Monday, October 25, 2010

Caramel Apple Cupcakes - What's Baking Challenge


Print

Recently, another foodie friend of mine, Carrie, mentioned she was interested in putting together a monthly baking challenge, so several of us got together and worked out all of the kinks and came up with a group called, What's Baking!  Each month, one person will be designated to pick a theme and each of us has to come up with our own interpretation and bake something yummy.  This is our first month and the theme chosen was Fall Cupcakes.

Seems easy enough, right?  Wrong.  I had a million ideas of what I wanted to do.  Pumpkin, of course, topped that list along with apples.  I wanted to do something different.  Something that I've never made before but something that would be easy enough for readers to follow along with and something that would be delicious.  I had narrowed it down to two ideas one being pumpkin and the other apple.  So I relied on my handy decision-maker, Chris!  Being a hard choice for him to make, we mutually agreed that the Caramel Apple Cupcakes would be a wonderful way to celebrate this challenge. 


I mean, everyone loves cupcakes (they're all the craze right now) and who doesn't love a good caramel apple?!  So, I rounded up my ingredients and went off baking.  When they first came together, I was worried that they'd be more like muffins but the texture is very cake-like and the flavor is very apple-y and the caramel (and peanuts) on top made for a delightful translation of the real thing into a cupcake!  I know some have preferences of how they like them...some like 'em just the way they are with plain caramel and others prefer them "dressed" up a bit with chopped nuts, sprinkles, chocolate chips, a little icing drizzled over them....  So I decided to do a mixture of both the original style and some with chopped peanuts on top!  I can pretty much sum these up with one word: YUM!


Caramel Apple Cupcakes

Ingredients
1 1/4 cups Flour
2 Tsp. Baking Powder
1/2 Tsp. Cinnamon
1/2 Tsp. Salt
2 Eggs
1/2 cup Brown Sugar, packed
1/2 cup Sugar
1/2 cup Vegetable Oil
2 Tsp. Vanilla Extract
2 Apples, peeled and shredded
25 Caramels, unwrapped
2 Tbsp. Heavy Cream
Chopped Peanuts (optional)

Directions
Preheat oven to 350 degrees.  Line muffin/cupcake pan with liners.

In a medium bowl, whisk together the flour, baking powder, cinnamon and salt; set aside.

In a large bowl, whisk together the eggs, brown sugar and sugar.  Add in the vegetable oil and vanilla, whisking in between each addition; mix until well combined.  Add in half of the flour mixture to the egg mixture, whisking until well combined.  Add in the remaining flour mixture and whisk until blended.  Add in the apple and mix in until it's incorporated throughout the batter.  **Be sure to to place the shredded apple in a dish cloth and squeeze the juice out of it so it doesn't make the batter runny**

Using an ice cream scoop, fill the cupcake liners with the batter almost to the top.  Bake for 25 minutes or until a toothpick inserted in the center comes out clean.  Let cool.

In a double boiler, melt the caramel and heavy cream over med-high heat.  Stir constantly until it forms a smooth and creamy consistency.  Carefully spread the caramel over the tops of the cupcakes and top with chopped nuts, sprinkles, chocolate chips or whatever your heart desires!

Yield: 12 Servings
Source: Adapted from Everyday with Rachael Ray
Continue reading...

Monday, October 18, 2010

Homemade Oreos - Power of Pink Challenge


Print

As you all know, October is a month of celebration for many reasons: Halloween, the beginning of Fall (at least in my eyes), the time for cooking comforting foods, the time for baking all things pumpkin/apple/cranberry-related, and it's Breast Cancer Awareness month. 

Did you know that 1 in 8 women will get breast cancer within their lifetime?  With statistics like that, most of us (if not all of us) know or have known at least someone who has experienced this dreadful disease.  And if you don't know anyone who has, then chances are, you probably will.  In fact, in 2010 alone, it is estimated that over 209,000 people will get diagnosed with breast cancer (men included).  That's a scary statistic!

It is so crucial for us to all do our part in supporting and helping with the awareness of Breast Cancer.  You never know how it could affect you...your Mom, Sister, Aunt, Grandmother, Cousin, Best Friend, Dad, Brother or even you.  That's why when my friend, Jen, posted about her Power of Pink Challenge, I knew that I wanted to be a part of it.  If we can be successful in touching even 1% of our readers' lives and encouraging them to be proactive about this deadly disease, then I feel like I've done something.  While it may not be enough, it's still 1% more than what I had done yesterday. 

Jen, the creative brains behind Beantown Baker, has challenged all of her fellow bloggers to create something PINK!  By the way, if you haven't checked out her blog yet, please, please do so!  She is one of the first bloggers I started to follow and she is one who inspired me to start blogging as well (she's also gone pink for the month, so definitely check it out when you get the opportunity)! 

Jen is going on her 3rd year of doing this challenge (you can see some of the ideas others have posted the last couple of years here), so naturally, I wanted to do something different and something she didn't already have from years before.  That was my biggest challenge.  I could've made it easy and did a simple sugar cookie cutout with pink frosting or M&M cookies with pink M&M's.  But those have been done and they're too predictable.  And then it finally hit me as I was going through loads of recipes in my cookbooks and Google Reader....OREOS.  I decided to to make homemade Oreos and dye the best part of them pink!  I had been eyeing the recipe for quite some time but just never got around to making them and this weekend was finally the end to that.

Oh.My.Goodness.  I cannot believe how much these taste like the real thing!  They are practically the real deal and with a few tweaks, they could definitely give the store-bought packaged cookie a run for their money.  They're definitely a close call; however, the cookie portion was a little soft for my liking.  I mean, Oreos have the hard, crunchy outer layer of chocolate cookie with the soft, velvet-like cream center.  The cream center in these bad boys was dead on.  But the cookie itself was a little "off" and if you're going to make them, I would recommend going much smaller than what I did.  I didn't have anything small enough and ended up using a round cookie cutter, but they're just waaayyy too big and overly sweet for our taste buds when they're like that.  But all in all, a fabulous cookie and definitely something to make again!


Homemade Oreos

Ingredients - Cookie
2 1/2 cups Flour
1/2 cup Dutch-Process Cocoa Powder
1/2 Tsp. Salt
1 cup Unsalted Butter
1 cup Sugar
1 Egg
1 Tsp. Vanilla Extract
Directions
Preheat oven to 350 degrees.  Line baking sheets with parchment paper.
In a medium bowl, whisk together the flour, cocoa powder and salt; set aside.

In a large bowl, cream together the butter and sugar until light and fluffy.  Add in the egg and vanilla; beat until well combined.  Add 1/3 of the flour mixture to the cream mixture, beating on low until combined.  Add in the remaining flour mixture (1/3 at a time), mixing in between until both mixtures are combined together.
On a lightly floured surface, roll out the dough until it's 1/2-inch thick.  Using a cookie cutter in the shape of your choice, begin cutting out the dough and placing on parchment-lined baking sheets.  Place baking sheet in freezer for 5 minutes and then bake for 8 minutes.  Let cool completely. 

Ingredients - Cream Filling
1/4 cup Unsalted Butter, at room temperature
1/4 cup Vegetable Shortening
2 cups Powdered Sugar
2 Tsp. Vanilla Extract
Food Coloring (optional)
 
Directions
In a medium bowl, beat together the butter and shortening.  Gradually add in the powdered sugar and vanilla.  Continue mixing until light and fluffy.  If dyeing the cream, add in the food coloring to achieve the desired color.


Place the cream filling in a pastry bag or resealable bag with the tip cut off and begin assembling the cookies by piping a large amount of cream into the center of one cookie.  Top with another cookie of equal size and gently press down so the cream filling spreads out to the edges.  Continue this process until all of the cookies have been assembled.

Yield: 18 Large Cookies
Source: Cookies adapted from Bake at 350, originally from Cookie Craft;  Cream Filling adapted from Smitten Kitchen, originally from Retro Desserts
Continue reading...

Tuesday, October 12, 2010

Loaded Baked Potato Soup


Print


With Fall weather comes Fall meals.  We have been having some incredible weather lately and I have been inspired.  I finally got my groove back in the kitchen and have been on a cooking craze these days.  I have so many new things that I want to try and most of them are perfect Fall and Winter meals. 

I definitely want to add more soups to my repertoire and believe it or not, Loaded Baked Potato Soup was on that list.  I can't believe I've never made it, especially given how much we love loaded baked potatoes!  I've made Potato Soup plenty of times but I've never taken it a step further by loading it up...silly me.  What was I thinking?!

I had several potatoes that I had to use up before they went bad and what better way to do than by combining them in a creamy mixture with bacon, cheese, and green onions?!  Sounds like heaven to me!  I actually had a recipe picked out from none other than my favorite cookbook in the whole wide world,Grand Temptations, but at the last minute, I decided to change it up a bit and ended up altering another recipe I found online - normally, I'll change up a few things to accommodate our tastes more, but shamefully, it happened this time because I read the directions wrong and somehow saw things on there that weren't really there and also got it mixed up with another recipe I had been eyeing.  But all is well that ends well because this soup ended up turning out perfectly!  It was so, so good.  Ridiculously good.  And it was all by mistake!

Loaded Baked Potato Soup

Ingredients
5 Lg. Potatoes (Baking, Idaho, Russet, etc.), peeled and cubed
2 cups Chicken Stock
1 cup Water
6 Strips Bacon, chopped
1 Sm. Onion, diced
3 Stalks Celery, diced
3 Tbsp. Butter
3 Tbsp. Flour
1 cup Milk
1/2 cup Heavy Cream
1 cup Cheddar Cheese, shredded
3 Green Onions, diced

Directions
In a large pot, add the potatoes, chicken stock and water; bring to a boil and simmer for 20 minutes.

In a large pan, cook the bacon over med-high heat until crisp.  With a slotted spoon, remove bacon pieces and let cool on a paper towel covered plate.  Meanwhile, add the onion and celery to the pan and cook in the reserved bacon grease until tender.

Once the potatoes have cooked, place a few spoonfuls of potatoes into a separate bowl and begin mashing with a potato masher; set aside.

Meanwhile, combine the milk and heavy cream; set aside.  In a small saucepan, melt the butter over medium heat.  Add in the flour and whisk constantly for 2 minutes.  Gradually whisk in the milk/cream mixture and let come to a boil over medium heat until thickened. 

Add in the mashed potatoes to the remaining cooked potatoes and carefully stir in the butter/milk mixture.  Add in the cheese, bacon, green onions and celery/onion mixture; stir to combine.  Let simmer until heated through.  Season to taste with pepper.  **If it becomes too thick, you can think it out a bit with chicken stock**

Serve warm and top with shredded cheese, bacon, green onion and/or sour cream.

Yield: 4-6 Servings
Source: Adapted From Cooking During Stolen Moments
Continue reading...

Thursday, September 30, 2010

Chicken Pasta with Lemon & Artichokes


Print

I know that I've talked a million times before about my favorite cookbook, Grand Temptations.  You know, the one that was made by the Grand Rapids Junior League that I was a part of?  Yeah....that one.  I really wish that I could buy a bunch of copies and give them to y'all because it really is a fantastic book.  There is not one single item that I've made from it that wasn't good.  And believe me when I say that I've made a ton of recipes from it and every dish has been superb!  It's such a great book for entertaining as well because it really helps you to be a "show off" in the kitchen (but not in a mean, snotty, "I'm better than you" way).  They're impressive recipes and they come from renowned chefs and restaurants in West Michigan, so they better be good, right?!  I'm telling you, you need to go out and get this book.  Who knows?  Maybe someday (soon) I'll end up giving one away!

Okay, enough about the book and onto the recipe.  I needed to talk about the book a little bit as my segue into this dish because, well, it's a recipe found in the book!  This was actually my first time making it and I've been eyeing it for a while but just never got to the actual task of preparing it.  So in planning my menu for the week, I went through my list (yes, I have a list...a long list, actually, of dishes I'd like to make in the next couple of months) and saw it on there.  It actually reminds me of an adaptation of Chicken Piccata, which if you're ever looking for a good recipe, Ina Garten's version is definitely the best!

Anyway, this recipe is a little more heavy than Chicken Piccata but the lemon juice helps to lighten it up a touch and the breading on the chicken is rather light as well.  All around, it's a great dish to make for Fall and into the Winter and served with a nice salad and some Italian bread, it'd be a great meal to entertain with as well!


Chicken with Lemon & Artichokes

Ingredients
4 Boneless, Skinless Chicken Breasts
Flour
2 Eggs, lightly beaten
1/4 cup Milk
1/2 cup Bread Crumbs (I prefer Panko)
1/2 cup Parmesan Cheese, grated
Olive Oil
1 Sm. Onion, minced
1- 12oz. jar Artichoke Hearts, roughly chopped
1 Lemon, juiced
1/3 cup Chicken Stock
1/2 Tsp. Dried Basil
1/2 cup Butter
Salt to taste
Pepper to taste
1/2lb. Spaghetti, cooked

Directions
Preheat oven to 300 degrees.  Heat olive oil in a large skillet over med-high heat.

Set up a station to coat the chicken breasts with 3 shallow bowls.  In the first bowl, add the flour.  In the second bowl, combine the eggs and milk; whisk until blended.  In the third bowl, combine the bread crumbs and cheese; mix until combined. 

Pat the chicken breasts dry with paper towels and begin the breading process by dipping each breast in the flour, then into the egg mixture followed by the bread mixture (be sure to coat both sides). 

Carefully place each chicken breast into the hot skillet and saute' until golden brown on each side (about 1-2 minutes). 

Remove the browned chicken breasts to a baking dish and bake until the juices run clear (about 25 minutes).

In a large skillet, heat 1 tablespoon of olive oil over med-high heat.  Add in the onion and saute until tender.  Add in the artichokes, lemon juice and chicken stock; mix well and cook until the liquid is reduced by half, stirring occasionally.  Mix in the basil and butter to create a smooth sauce and season with salt and pepper.

Serve the chicken over the pasta and top with the lemon and artichoke sauce.


Yield: 4 Servings
Source: Adapted from Grand Temptations
Continue reading...
 

With a Cherry on Top Copyright © 2009 Designed by Ipietoon Blogger Template In collaboration with fifa
Cake Illustration Copyrighted to Clarice